In our most recent blog post series, we’re walking through each of our design phases by focusing on the visuals that we use with our clients. We started off talking about Schematic Design and last month we continued the series by discussing Exterior Design Development (DD).
This week, we are taking a closer look at the second part of our DD phase – Interior Design Development. As we discussed in our last post, Interior Design Development starts during the second meeting of DD. We look at interior elevations, begin discussing interior materials, and start finalizing fixtures, appliances and other client selections. Typically, this is a really fun meeting that involves lots of new things to look at and think about! In this post, we’ll outline all of the prep work and materials we work on for this second DD meeting. We’ll also talk a bit about the third and final meeting in Design Development. This meeting usually wraps up some revisions from the first two meetings and includes more technical info for our clients.
Interior Elements
After our first DD meeting, we’ve gathered a lot of great information about what materials we will use on the exterior. It’s just as critical to spend some time researching and investigating different materials that we might use on the interior. We look at how kitchen cabinetry will work with countertops, where bathroom tile will meet a vanity, and how all of the different fixtures and finishes that our clients select will work in the home.
We spend most of our time in this phase drawing interior elevations. These two-dimensional architectural drawings describe how elements are laid out across a wall. By this point, we’ve spent a lot of time looking at the plans. From plans, clients may know where the bathtub is in relation to the vanity. Iinterior elevations will provide more information about what kind of tub, style of vanity, and how tall each element is.
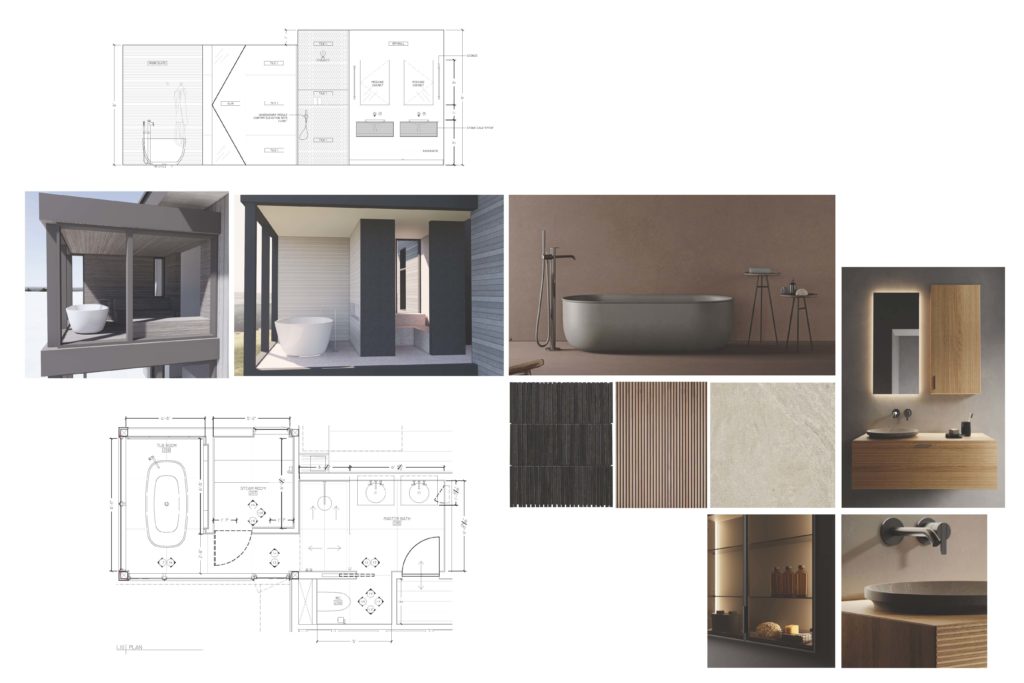
Interior elevations also begin to describe finishes. Which wall of a bathroom are drywall? Where does the shower tile end and is the floor concrete, wood, or also tile? We also spend time making sure that elements in these spaces are as impeccably aligned as parts of the plan. We strive to make the interior of the house as refined and thoughtful as the floor plan and the exterior. However, as always, we work in collaboration with our clients. During interior DD, they make a lot of decisions directly. We trust that they know best which kitchen sink and faucet combo work best for their style of cooking, and which line of fixtures they might want in their bathroom. We are always happy to make suggestions, but for the most part we rely on our clients to provide us with the specifics.
DD2 Meeting: Getting Into It
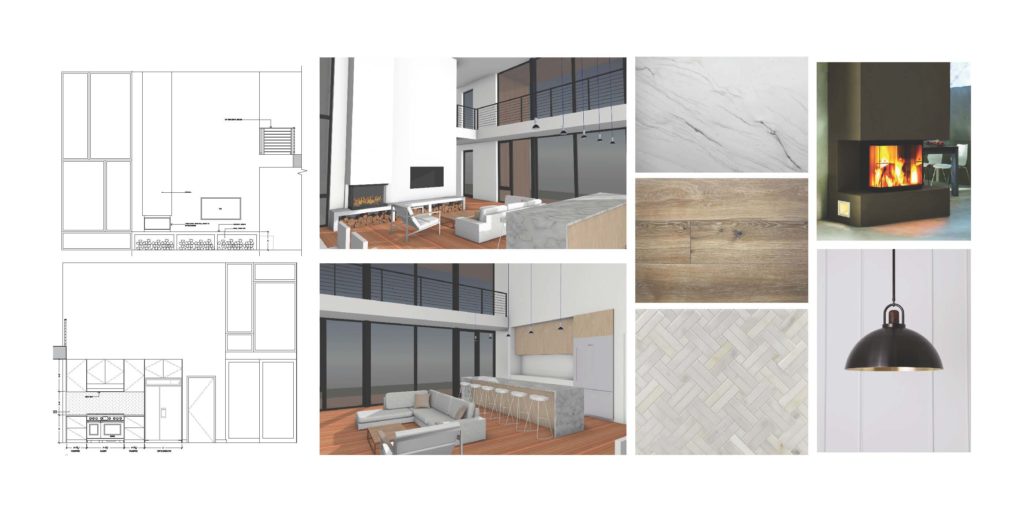
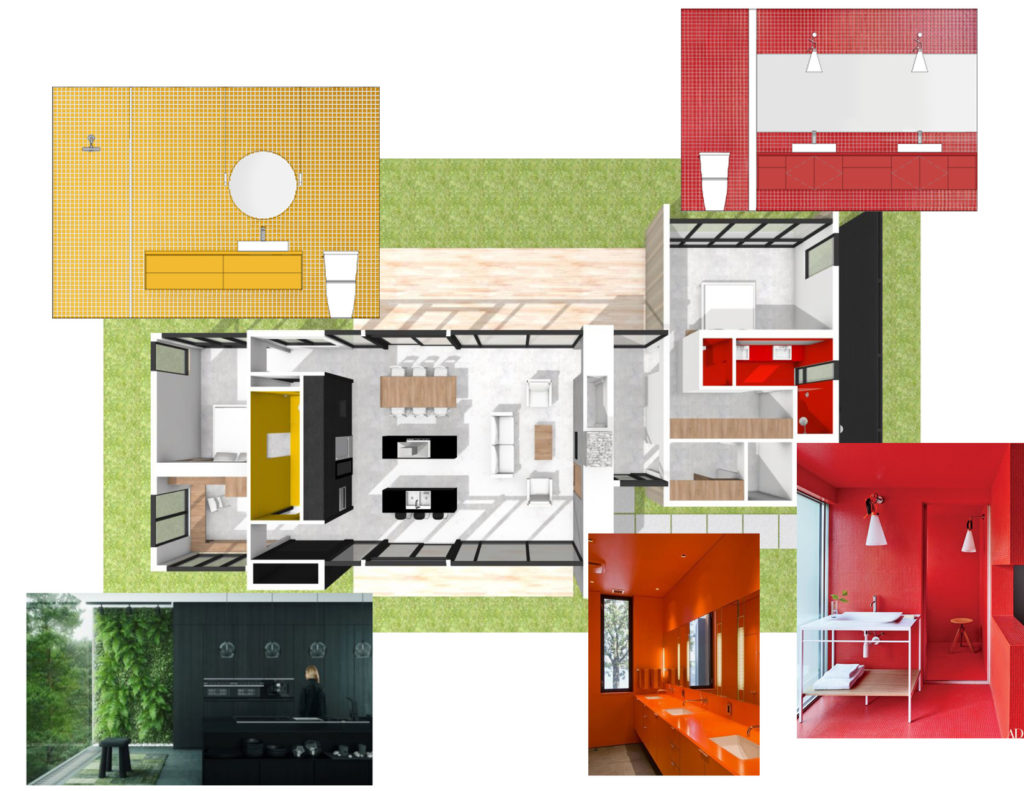
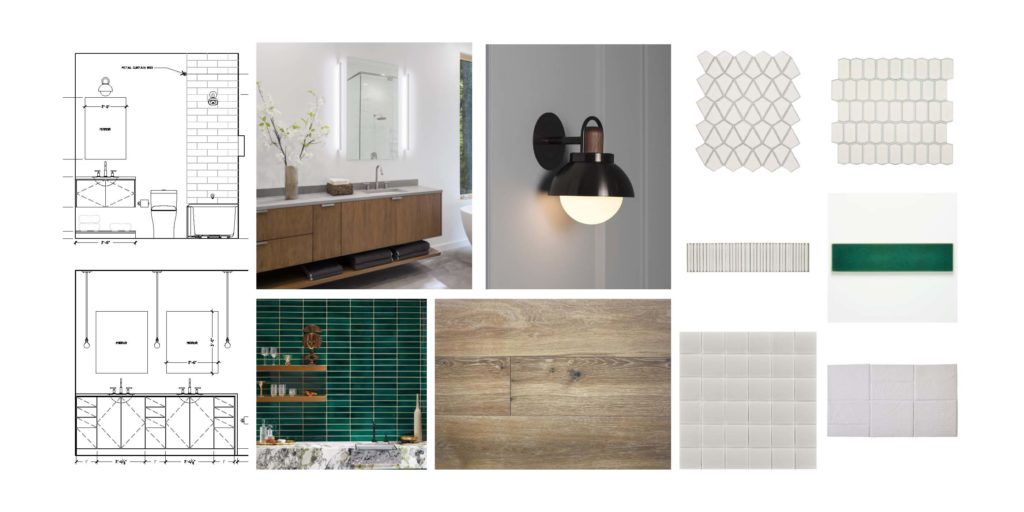
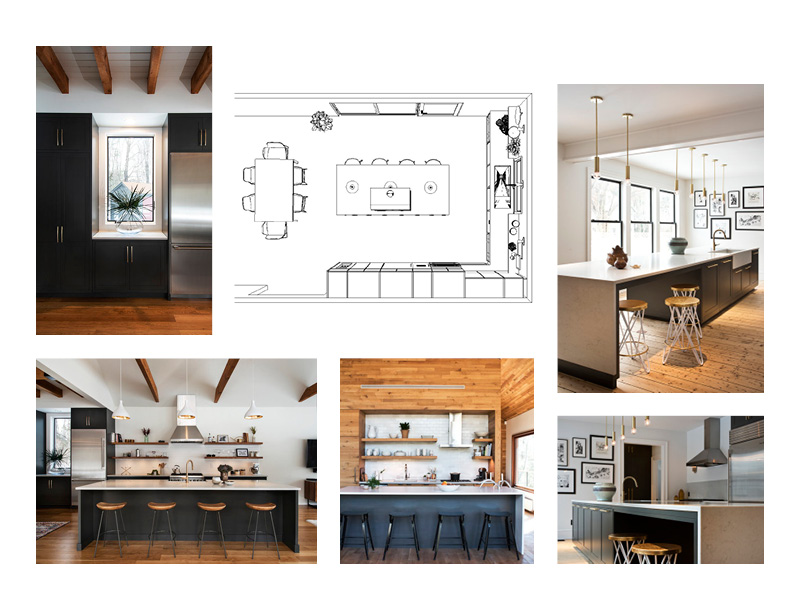
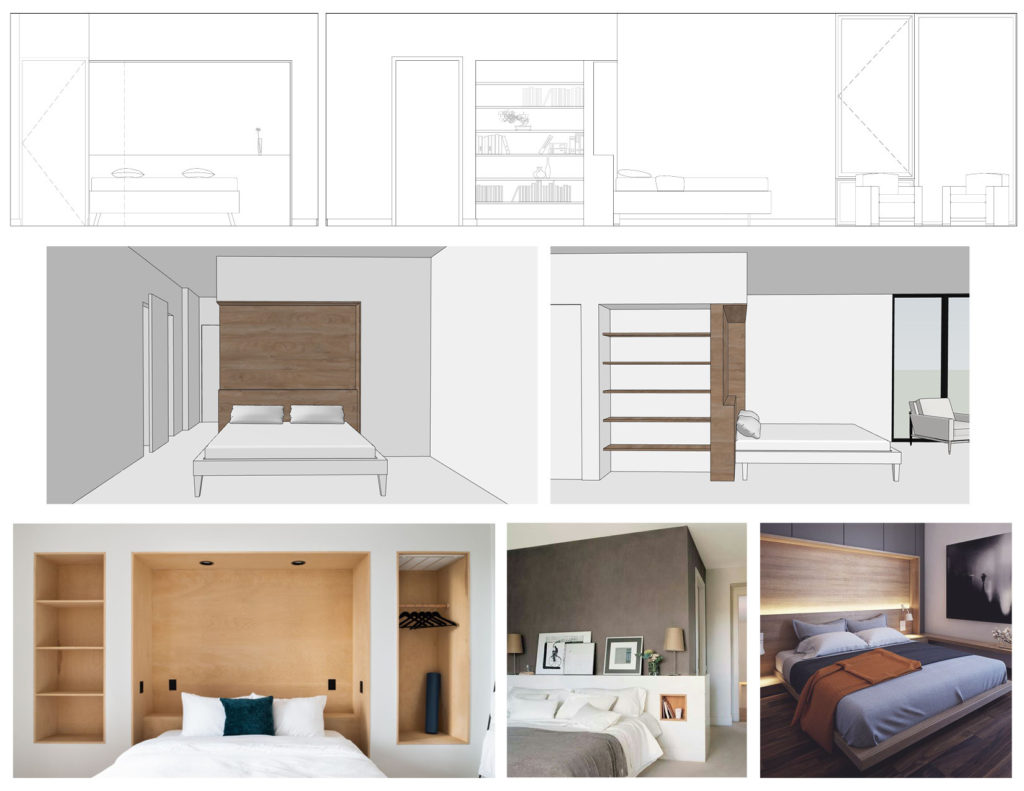
During our DD2 meeting, we will primarily be looking at sheets of interior elevations in conjunction with some inspiration images. As we did for our schematic design meetings and for our first design development meeting, we find that inspiration images often help to communicate the design intent behind our line drawings. Images can also help to convey color and texture. Occasionally, we will present model shots to show how a specific built in works in the space. Bexley House, shown below, is a great example of this. We also discuss lighting and look at a reflected ceiling plan to visualize where recessed lights, pendants, chandeliers and sconces are best suited.
During DD we are working on developing multiple aspects of the project simultaneously. In our DD2 meeting, we sometimes also show revisions to our exterior model from our last meeting.
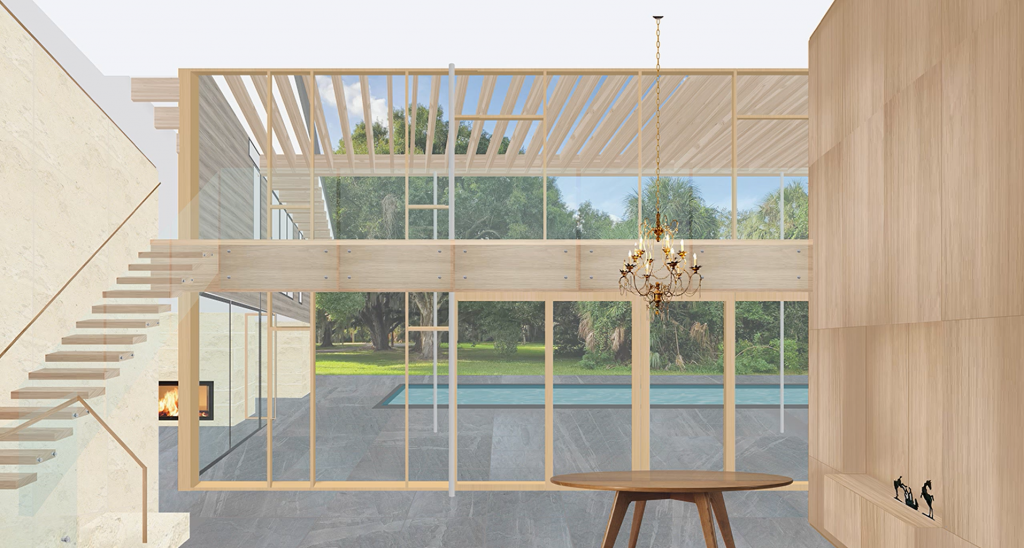
It’s also worth noting that we have a lot of different tools available to us. Even though we primarily communicate through architectural drawings and inspiration images, there are projects that require a bit more finessing. 8 Oaks, a rendering for which you see above, is a great example of this. We’re working with our client to finalize some material choices and created a few versions of the image above. Since there are a few different materials coming together in one space, we want to make sure that we are making the choice that is both the most evocative and the best for client’s budget. We don’t do this level of visualization for every project, but client collaboration can take many forms. It’s just a matter of which tools and methods are best suited for each client and for each individual home!
DD3 Meeting: Finalizing Decisions
After our second design development meeting we typically take a few weeks to make revisions. Part of the goal of this meeting is to confirm that we’ve incorporated all of our clients’ requests and refinements. We finalize any choices that need to be made prior to starting our Construction Documents. Besides revising existing drawings, we also begin to work on incorporating initial structural sketches into our plans. We draw building sections to describe the overall conditions of the home, and draft plans for HVAC. We also begin drafting specifications, create schedule for windows and doors, and start detailing mechanical elements of the home.
During our DD3 meeting, we share all of these drawings with our clients. Sometimes, our clients are eager to see and understand everything about their home, so we spend a good amount of time explaining how HVAC will work or what is key about our specifications. Other times, we focus more on revisions to the exterior and interior aesthetics. No matter our clients’ preferences, by the end of our Design Development phase we will be very well set up to begin working on the most technical step of our process – Construction Documents.
We look forward to sharing more about CDs in our next post, so keep an eye out! In the meantime, if you’re curious to learn even more about our Design Development process, feel free to check out some of our prior posts on exterior design and interior design.
ICYMI:
Illustrating Our Process: Schematic Design
Illustrating Our Process: Exterior Design Development
Illustrating Our Process: Construction Documents
Illustrating Our Process: Bidding, Value Engineering and Permitting